Saturday, 28 January 2017

Mixed Media Tag: There's No One Like You! (butterflies)


Hello :)

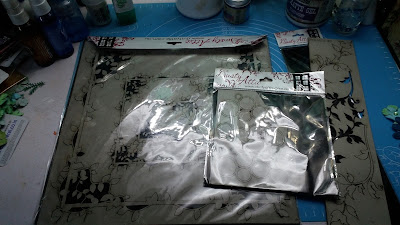
Today, I would like to share a mixed media tag I created using the packaging from my set of sculpey tools. It was perfect because it had printed words on it and it was thick cardboard so it could withstand sprays, water, mediums etc without getting warped. I went with the flow and did not have a particular design in mind, the aim was to keep layering until the desired look was achieved. This tag carries the message of valuing uniqueness, all of us are different and sometimes because of social norms, we feel the pressure of conforming to what is expected and end up losing our uniqueness. It is important for us to realize that whatever we are, we need to embrace it and celebrate our individuality and as a corollary be tolerant of the differences in others. This is especially important for children and adolescents because bullying, peer pressure, parental expectations are big issues which can have far reaching consequences. So back to the tag, I have used a new technique for me which is to create depth by stamping (background and foreground). The color scheme was of "umber" (browns) and I added yellows and blues to lend contrast. 


Here are a few pictures of the process: 

(The packaging from my sculpey starter kit formed the base of this tag)

(Applied white gesso on the tag, stamped the botancil kaisercraft stamp with archival ink)

(Stamped the inkadinkado fairies and peekaboo designs mini stamp with archival jet black ink on snippets of white cardstock)

(Colored the stamped images with distress crayons and distressed the edges with the tim holtz distress tool)

(Stamped the sentiment from stamplorations- trendy feathers 2 stamp using archival jet black ink and butterflies with chalk inks)

(Added colors using little birdie sprays and cosmic shimmer spray, also used tropical gelatos as well as black and brown eyeliner)

(After spraying the colors since the stamped images went into the background, some butterflies  were stamped again using archival jet black ink so that they form the foreground) 

(Embellishments like twine, fabric flower, butterfly and flower sequins, snippet of gauze, gems, leaf diecuts and pollens. Also prima's 3D matte gel was used to stick all these embellishments and ranger's dry glitter was added to the fairy image to create a magical dust look.)

To finish off, few more colors were added to bring it all together and splatters of white were made using white gesso.

Here are a few pictures of the finished tag:


Thanks for your time! Would love to read your comments :)
Stay Blessed.

I am playing along with the following challenges:

1. Butterfly Challenge # 71 (There are butterflies, umber shades have been used and "underneath" is interpreted as many layers have been used in the projects, so there are hidden elements beneath the ones on top- stamping and embellishments)


2. Pixie's Snippets Playground: Weeks 265 and 266 (Snippets of white cardstock used for stamping and snippet of gauze used for texture)


5. More Than Words Mini Challenge: "One" (facebook) (The word one has been used twice, in both the sentiments)

6. Craftyscrappers Challenge 14 (facebook) (Used the new technique of multiple stamping to create depth)

7. Stamplorations Anything Goes Challenge (The sentiment is from the Stamplorations- trendy feathers 2 stamp set)


8. Happy Little Stampers Mixed Media Challenge  (Layers of stamping have been done and embellishments are also positioned in layers)


9. Happy Little Stampers Anything Goes with Dies (Leaf die cuts have been used from cheery lynn dies and sizzix bigz die)

Tuesday, 10 January 2017

Crafting Tips: Being Frugal #1

Hi there!!

So I decided to write a quick post about a few things I have learnt through my own personal experience of purchasing things for crafting. Crafting and art material in general can be very expensive and in certain countries where we do not have many multi-chain big stores for such supplies which offer gargantuan discounts, it can be taxing on the pocket. So I thought I would mention a few things to save money/materials and I will add more tips in subsequent posts. 

1. Do-It-Yourself Alternatives: Now it is super fun to buy a product and use it and we all get the excitement of it but what if the product is just not available or the price being asked for it is super high? There are so so many DIY options for so many supplies out there. For example-

- Emboss buddy- It is the tool which we dab onto a paper so that while heat embossing stray particles of embossing powder do not stick to the paper (because the oils in our hands with which we sometimes inadvertently touch the paper can attract the powder). This is a tool we all can make at home just like I did by making a little bag out of a piece of cloth with some talcum powder or cornflour inside and then we can either stitch it or glue it together so the powder does not scatter. That's it, easy peasy. Then every time you want to emboss, just take this little bag, dab it on the paper, it will release small particles of powder (that's ok, you can just brush them off later), stamp with versamark ink and then spread embossing powder over it and heat it with a heat tool. 

- Color Sprays- It is super easy to make color sprays, you do need a spray bottle and then there are many youtube videos on how to create your own sprays. The way I have used is to add a little bit of Prima-Finnabair Mica Powder to a bottle of water, shake it and it gives great results. The color sprays turn out light and pastel with a shine. There are so many other ways of making sprays using acrylic paints, brushos, magicals, distress reinkers etc, check it out for yourself.

- Distress Tool or deckler- This is the tool used to create a rough, worn out edge around paper for mixed media and shabby chic styles among others. I have such a tool but I think just using the edge of a pair of scissors is great and sometimes gives better results!! Also, if you craft a lot, you will probably end up breaking a few pairs of scissors so this is a great way to use those broken scissors. 

- Punch boards- There are punch boards out there which allow you to create your own envelopes and boxes and the like and that's great. I bought one and I do like it but I don't really use it and let me tell you it isn't fool proof, the indentations where you have to create score marks can sometimes make you go awry and honestly, I don't think it is worth it. It is way better to make envelopes and boxes the old school way. I am not saying it isn't great for all but personally, I won't buy it again if I could go back in time!

- Sentiment Stickers - There are some gorgeous stickers out there with typed sentiments that look awesome when used on projects and I bought one such over-priced set. I would not do it again. Why? Because it does not have all the words that one might need (the word celebrate was missing and I think that's a pretty major word to not have on an ensemble of sentiments) also because I think I could just as easily have typed sentiments on the word file and printed it out, cut it and used it. It would've taken longer but I would get exactly the sentiment I wanted and also spent a fraction of the cost (just a printout). 

That's it for now, I will write about more tips/lessons I have learnt in other posts. 

Thanks for your time!! 
Happy Crafting and Stay Blessed :)

Sunday, 8 January 2017

Mixed Media Layout: Celebrate

Hi there!!

8 days into the new year and I finally decided to do some crafting. So today I created a mixed media layout with the theme of celebrating with family. I was inspired by a vintage photo of a family decorating a christmas tree and celebrating festivities so I thought that photo should be the focus of the layout. I think it is important to spend quality time with our near and dear ones and this layout showcases just that. The process took about 4 hours and I created layers of texture by adding stamping, colors and embellishments in stages. I tried out a few new supplies which I gifted myself for christmas and some which my mom shared with me since we sometimes craft together and live in the same house :) its always fun to try out new things along with using old things!! (I didn't have a black gelato so I decided to use some black and brown eyeliner pencils). I love watching youtube video tutorials and the work of Marta Lapkowska and Gabrielle Pollaco really inspired me to try out mixed media :) 

 Here are a few pictures of the supplies and process:


(Tore pieces of cardstock, distressed the edges with vintage photo distress ink then heat embossed the mudra old script stamp using versamark watermark ink, zing white embossing powder, homemade emboss buddy and heat tool)


(stamped the die cut tags with different stamps using jet black archival ink and then distressed the edges of the tags with vintage photo distress ink)


(Layered the tags with the photo on top, matted the photo with a blue glitter cardstock to add bling and make the photo stand out.)


(Created Texture with impasto paste and Artplorations retro cirlces stencil, Then used flower stencil with round blending tool+foam and peacock feathers distress inkpad to create floral designs all over. Then sprayed the layout with various colors of blue and brown inks)


(Adhered Dusty attic chipboard to the layout using Tombow multi glue)


(Adhered embellishments like flowers with tombow multi glue then created darker outlines around the tags using black and brown eyeliner pencils)

Additionally, the celebrate die cut was heat embossed with white embossing powder to give it a shine and in the end I splattered the LO with white gesso)


Here are a few pictures of the finished project:


Supplies Used:

1. Black cardstock 280 gsm
2. Artplorations stencils - retro circles and bloom boldly
3. Dusty Attic chipboards- Bubbles, deVine Frame set and Foliage #2
4. Sizzix celebration script die
5. Distress inkpad- Vintage photo and Peacock feathers
6. Ranger's heat tool
7. Ranger's archival ink- jet black
8. Tropical gelatos (blue color)
9. Kohl pencil- black 
10. Brown eyeliner pencil
11. Gauze (snippet from the inside of an envelope)
12. Blue Glitter CS (snippet)
13. White Cardstock (snippets)
14. Mont Marte Texture Paste
15. Sizzix Tim holtz Tag collection die 
16. Palette knives
17. Blue sequins
18. Seed beads (light blue and dark blue)
19. Prima art stones (big)
20. Distress Crayons- blue
21. Little birdie color splash ocean mist and mocha
22. Cosmic shimmer spray- aqua breeze
23. Prima mica powder- blue 
24. Zing white embossing powder- opaque
25. Sentiment tiles 
26. Tim Holtz chit chat stickers
27. Mudra mini stamp- old script
28. Prima stamps 
29. MFT background burlap cling stamp
30. Water spray bottle 
31. Rag
32. Glue gun 
33. Little birdie flowers 
34. Gems 
35. Vintage Photo from Scrapberry's Postcards paper pack

Thanks for your time! Would love to read your comments :)
Happy crafting! Stay blessed 

I am playing along with the following challenges:

1. More than Words Main Challenge- January  ( I have included the word celebrate and bling in present in the glitter cardstock, cosmic shimmer spray, gems and sequins)
2. Stamplorations Mixed Media Challenge ( I have used two artplorations stencils)

3. Dusty Attic Challenge- January ( I was inspired by the blue colors of the moodboard)

4. Happy Little Stampers Mixed Media Challenge (I have created layers of tags behind the photo and layers of stamping and colors step by step as the piece progressed)


5. Pixie's Snippets Playground- Week 263+264 ( I have used many snippets of cardstock and gauze)

6. Simon Says Monday Challenge- Start Afresh ( I have used some brand new craft products for the layout which include 2 designs of chipboard, distress crayons, cosmic shimmer spray, one new stencil, tim holtz chit-chat stickers and sentiment tiles)

7. Simon Says Wednesday Challenge- New Something ( I have used some brand new craft products for the layout which include 2 designs of chipboard, distress crayons, cosmic shimmer spray, one new stencil, tim holtz chit-chat stickers and sentiment tiles)

8. Stamplorations Anything Goes Challenge


10. Mudra Craft Stamps: challenge #5 ( I have used the mudra mini old script stamp and heat embossed it with white embossing powder to create the background)

Friday, 6 January 2017

birthday card

Hi there

Happy new year :)
Heres wishing you loads of joy and creative vigor in 2017.
Today I decided to share a card I made a while back but did not blog about it. It is a simple birthday card but I really love the stamped image of the birds :) it is cool that it looks water colored!! I basically used zig clean color real brush pens to color the penny black cling stamp and then sprayed it with some water and then stamped. The stamped image and the sentiment (from  itsy bitsy stamp set) is stamped on snippets of white CS I had lying around. The circle I punched out with my ek tools circle punch. Even the washi tape on the side is a little bit left over from the roll. I liked it so much that I bought 2 new rolls of it :) ( I love washi tapes!!) I distressed the circle with the sentiments on it with festive berries ranger's distress ink and round blending foam + tool. The sentiments were stamped with ranger's archival jet black ink.

Here are a few pictures of the card


Thanks for your time!! Would love to read your comments :) 
Stay Blessed and happy crafting 

I am playing along with the following challenges: